How To Draw A Python In Six Easy Steps
Contents:
Then, under the headings for specific types, only the specialized additional methods are discussed. When you first create a GraphWin, the y coordinates increase down the screen. To reverse to the normal orientation use my GraphWin yUp method. You generally want to continue displaying your graphics window until the user chooses to have it closed.
There are two ways to call it, depending on whether you want to use an existing Text object, or just specify a location for the center of the prompt. Each graphical type can be converted to a string or printed, and a descriptive string is produced for debugging purposes. It only shows position, not other parts of the state of the object. Make a program scene. You are likely to need to adjust the positions of objects by trial and error until you get the positions you want.
Make sure you have graphics.
Buy for others
Elaborate the scene program above so it becomes changeScene. You may use the position of the mouse click to affect the result, or it may just indicate you are ready to go on to the next view. Zelle chose to have the constructor for a Rectangle take diagonally opposite corner points as parameters. Suppose you prefer to specify only one corner and also specify the width and height of the rectangle. You might come up with the following function, makeRect , to return such a new Rectangle. Read the following attempt:. The second corner must be created to use in the Rectangle constructor, and it is done above in two steps.
Start corner2 from the given corner and shift it by the dimensions of the Rectangle to the other corner. Unfortunately this is an incorrect argument. Run the example program makeRectBad. When you run it however that is not what you see. You should just see one Point toward the upper right corner, where the second corner should be. Since a Rectangle was being drawn, it looks like it is the tiniest of Rectangle s, where the opposite corners are at the same point!
Hm, well the program did make the corners be the same initially. We need to take a much more careful look at what naming an object means. A good way to visualize this association between a name and an object is to draw an arrow from the name to the object associated with it. The object here is a Point , which has an x and y coordinate describing its state, so when the makeRect method is started the parameter name corner is associated with the actual parameter, a Point with coordinates 20, Next, the assignment statement associates the name corner2 with the same object.
It is another name, or alias , for the original Point. The name corner is still associated with the same object, but that object has changed internally! That is the problem: The solution is to use the clone method that is defined for all the graphical objects in graphics. It creates a separate object, which is a copy with an equivalent state. We just need to change the line. Though corner and corner2 refer to points with equivalent coordinates, they do not refer to the same object. Run the corrected example program, makeRectangle. Read this section if you want a deeper understanding of the significance of mutable and immutable objects.
This alias problem only came up because a Point is mutable. We had no such problems with the immutable types int or str. Just for comparison, consider the corresponding diagrams for code with int s that looks superficially similar:. The third line does not change the int object 2. The result of the addition operation refers to a different object, 5, and the name b is assigned to it:. Hence a is still associated with the integer 2 - no conflict. It is not technically correct to think of b as being the number 2, and then 5, but a little sloppiness of thought does not get you in trouble with immutable types.
With mutable types, however, be very careful of aliases. Then it is very important to remember the indirectness: Another mutable type is list. A list can be cloned with the slice notation: Try the following in the Shell: Run the example program, backAndForth0. The whole program is shown below for convenience. Then each individual new part of the code is discussed individually:. Read the discussion below of pieces of the code from the program above.
Editorial Reviews
Do not try to execute fragments alone. There are both an old and a new form of import statement:. The program uses a function from the time module. The syntax used for the time module is actually the safer and more typical way to import a module. As you will see later in the program, the sleep function used from the time module will be referenced as time. This tells the Python interpreter to look in the time module for the sleep function.
If we had used the import statement. This is obviously easier, but it obscures the fact that the sleep function is not a part of the current module. Also several modules that a program imports might have functions with the same name. With the individual module name prefix, there is no ambiguity. You might think that all modules could avoid using any of the same function names with a bit of planning.
To get an idea of the magnitude of the issue, have a look at the number of modules available to Python. Try the following in the in the Shell and likely wait a number of seconds:. Without module names to separate things out, it would be very hard to totally avoid name collisions with the enormous number of modules you see displayed, that are all available to Python! Back to the current example program: The main program starts with standard window creation, and then makes three objects:.
- .
- .
- Graphics — Hands-on Python Tutorial for Python .
- .
- .
- Freland.
If objects overlap, the ones which used the draw method later appear on top. Other object methods like setFill or move do not alter which are in front of which. This becomes significant when cir1 moves. The moving cir1 goes over the rectangle and behind cir2. Run the program again if you missed that. This very simple loop animates cir1 moving in a straight line to the right. As in a movie, the illusion of continuous motion is given by jumping only a short distance each time increasing the horizontal coordinate by 5. This delay is important, because modern computers are so fast, that the intermediate motion would be invisible without the delay.
The delay can be given as a decimal, to allow the time to be a fraction of a second. The next three lines are almost identical to the previous lines, and move the circle to the left -5 in the horizontal coordinate each time. The next example program, backAndForth1. Only the small changes are shown below. This version was written after noticing how similar the two animation loops are, suggesting an improvement to the program: Animating any object to move in a straight line is a logical abstraction well expressed via a function.
The loop in the initial version of the program contained a number of arbitrarily chosen constants, which make sense to turn into parameters. Also, the object to be animated does not need to be cir1 , it can be any of the drawable objects in the graphics package.
The name shape is used to make this a parameter:. Then in the main function the two similar animation loops are reduced to a line for each direction:. Make sure you see these two lines with function calls behave the same way as the two animation loops in the main program of the original version. Run the next example version, backAndForth2. The changes are more substantial here, and the display of the whole program is followed by display and discussion of the individual changes:.
Moving a single elementary shape is rather limiting. It is much more interesting to compose a more complicated combination, like the face from the earlier example face.
- PnP Digital nº 1 - Migração de dados, micro desktop com Ubuntu Linux e outros trabalhos (Portuguese Edition)?
- .
- .
- .
To animate such a combination, you cannot use the old moveOnLine function, because we want all the parts to move together , not one eye all the way across the screen and then have the other eye catch up! A variation on moveOnLine is needed where all the parts move together. We need all the parts of the face to move one step, sleep, and all move again, This could all be coded in a single method, but there are really two ideas here:. This suggests two functions. Another issue is how to handle a group of elementary graphics objects.
The most basic combination of objects in Python is a list , so we assume a parameter shapeList , which is a list of elementary graphics objects. For the first function, moveAll, just move all the objects in the list one step. Since we assume a list of objects and we want to move each , this suggests a for-each loop:. Having this function, we can easily write the second function moveAllOnLine , with a simple change from the moveOnLine function, substituting the moveAll function for the line with the move method:.
Speed up your journey to learn python with these five steps. Course — I started Dataquest to make learning Python and data science easier. . If you do this right , you'll find yourself looking back on your code from 6 months ago and thinking. 6 drawing exercises to get you started right now! Go to the profile of . Step 7: Now use a dark pencil or pen to emphasise the cube. Voilà!.
The code in main to construct the face is the same as in the earlier example face. Once all the pieces are constructed and colored, they must be placed in a list, for use in moveAllOnLine:. Then, later, the animation uses the faceList to make the face go back and forth:. This version of the program has encapsulated and generalized the moving and animating by creating functions and adding parameters that can be substituted. Again, make sure you see how the functions communicate to make the whole program work.
This is an important and non-trivial use of functions. In fact all parts of the face do not actually move at once: The moveAll loop code moves each part of the face separately, in sequence.
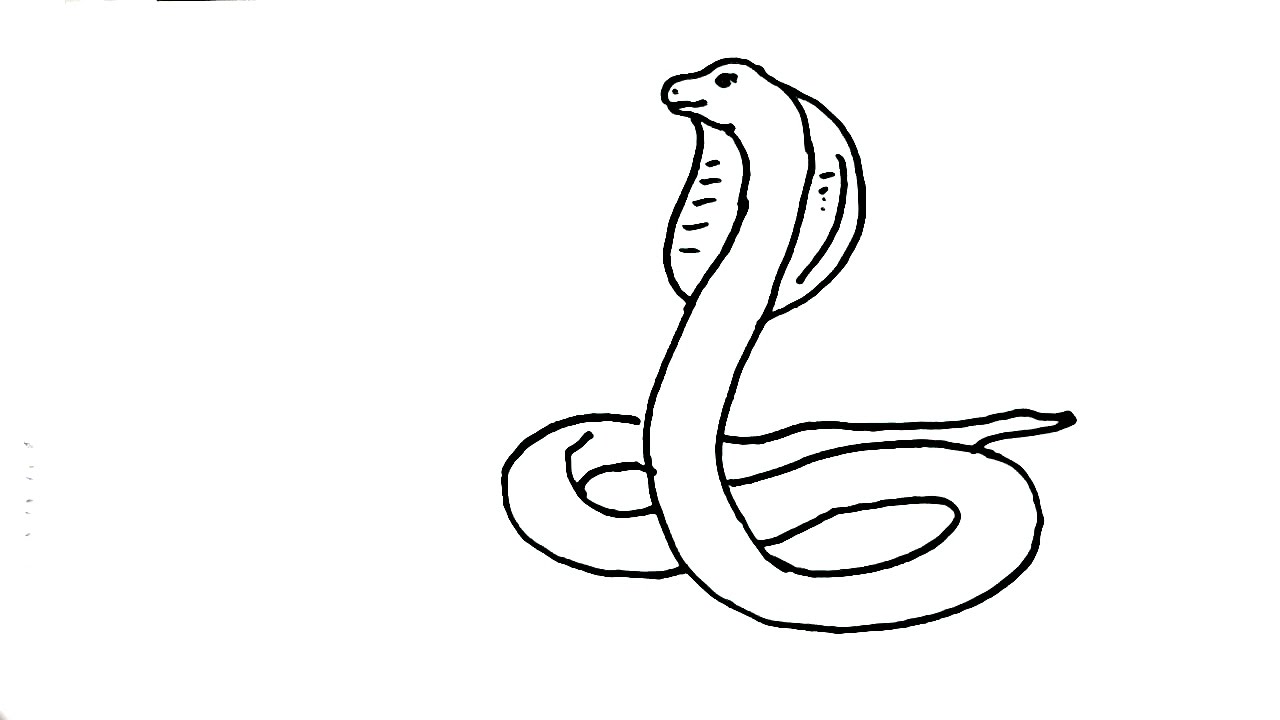
How To Draw a Cobra
Depending on your computer setup, all the parts of the face may appear to move together. Again, the computer is much faster than our eyes. On a computer that repaints the screen fast enough, the only images we notice are the ones on the screen when the animation is sleeping. On a fast enough computer you can make many consecutive changes to an image before the next sleep statement, and they all appear to happen at once in the animation. Not all computers are set up for the same graphics speed in Python.
Though the ideas for the coding have not all been introduced, it is still informative to run the example program colors. Then each individual new part of the code is discussed individually:. After the first two lines draw the prompting text, the line win. Technically the Line object is a segment between the the two points. Try the following in the in the Shell and likely wait a number of seconds:.
One machine that I use animates backAndForth2. Another seems to have the mouth wiggle. On the latter sort of machine, during animation it is useful not to have visible screen changes for every individual move. Instead you can explicitly tell the computer when it is the right time to redraw the screen. The computer can store changes and then flush them to the screen. Withholding updates is controlled by win. It starts as True, but can be changed to False before animation. When set to False, you must call win. That is going to be just before the time. Run the next example program backAndForth3.
The final version, backAndForth3.

Once you have encapsulated the code to make a face, we can make several faces! Then the problem with the original code for the face is that all the positions for the facial elements are hard-coded: The face can only be drawn in one position. The full listing of backAndForth3. As mentioned above, the face construction function allows a parameter to specify where the center of the face is.
The other parameter is the GraphWin that will contain the face. For the remaining Point s used in the construction there is the issue of keeping the right relation to the center. This is accomplished much as in the creation of the second corner point in the makeRectangle function in Section Issues with Mutable Objects. A clone of the original center Point is made, and then moved by the difference in the positions of the originally specified Point s. For instance, in the original face, the center of the head and first eye were at 40, and 30, respectively. The only other changes to the face are similar, cloning and moving Point s, rather than specifying them with explicit coordinates.
Then in the main function, the program creates a face in exactly the same place as before, but using the makeFace function, with the original center of the face Point 40, Now with the makeFace function, with its center parameter, it is also easy to replace the old cir2 with a whole face! The unidentified numeric literals that were used before are replaced by named values that easily identify the meaning of each one. This also allows the numerical values to be stated only once, allowing easy modification.
The animations in the loop body illustrate that the straight line of motion does not need to be horizontal. The second and third lines use a non-zero value of both dx and dy for the steps, and move diagonally.
Customers who bought this item also bought
Make sure you see now how the whole program works together, including all the parameters for the moves in the loop. Please try again later. The book is okay. What I like about it is that it has examples with code where I can learn from. It also points to other resources where I can learn more in depth. The cons are that there's a lot of typos, it uses Python 2, and when I get stuck at certain parts of the code, there's no clear explanations.
That said, I got up to page and intend to finish the entire book. One person found this helpful. This book is written in an excellent way from practitioners point of view than a math heavy one. With tons of information available over net in the machine learning area it is easy to get lost in theory.
I will say this book solved that problem to a greater extent by keeping a focused approach with clearly defined objectives six steps and lots of code examples. I enjoyed this book and the snippets are easy to follow and practice. Traditional Machine learning books wont cover this Topic but very much relevant 2.
Author has done a tremendous job to cover the breadth of this topic and condensed so well that it can fit in a single chapter. And practical code examples presented are very much in context for real use cases like text classification and sentiment analysis.
Finally I would say this book is for all who would like to start quickly and develop machine learning solutions. This is my reason for not This is my reason for not buying it. Python 2 is already depreciated and support ends completely in extended from Get with the program! I'm a beginner to Python and machine learning. I loved the flow of topics, breadth and depth covered. The illustrations are useful to understand the concept without getting too much into the mathematics behind. I was involved in the Technical Review for this book as a freelancer and I totally loved this book.
Manohar's book is one among the best available books for a Data Science enthusiast to get started and learn Machine Learning concepts with Python. The book covers a wide array of topics in Machine Learning in the right depth and breadth.
The author has done an amazing work in intuitively organising the content flow in the increasing order of complexity in a lucid language with simple, detailed and easy to understand examples. This is one of the most comprehensive guide for learning Machine Learning and I would highly recommend any data science enthusiast to grab a copy and start learning. Make thinner lines and shorten the snake's body.
If it still looks bad, try Googling some images for reference. Nature is beautiful but complicated. Try tutorials on YouTube or tracing to learn the anatomy. Not Helpful 1 Helpful 3. You can use paint, markers, crayons, colored pencils, oil pastels, watercolors, whatever you want to.
Not Helpful 2 Helpful 4. Use a reference photo. Study each part of the photo, and try tracing over it as you study the snake's anatomy. Not Helpful 2 Helpful 3. Answer this question Flag as How can I make the snake's eyes sharper? Include your email address to get a message when this question is answered. Already answered Not a question Bad question Other.
By using this service, some information may be shared with YouTube. Tips Draw lightly in pencil so that you can easily rub out mistakes. Article Summary X To draw a snake, start by making a circle for the head.